Tuesday, March 17, 2015

Short but beautiful power hike on Cardwell Hill Drive

We just discovered another new trail at the end of Cardwell Hill Drive. This one starts from the parking lot heading west with a 10 degree uphill grade for about a half mile where you quickly climb from about 500 feet to an elevation of 919 ft. There are no extraordinary views here of the valley below or of other peaks, though looking back you can see Dimple Hill in the distance. At this point (right at the first clearing where you see some large telephone lines) the path begins to go down hill quickly several hundred feet lower than the elevation you first started at.


Of course, right at this clearing, it began to rain, and having already brought my heart rate up to a good thumping, the first thought that entered my mind at this juncture was how difficult it would be returning along this route. Yes, Pedal Poppers and I had a notion of turning back right then and there, but we decided it was time to WTFU (anyone who has ever worked with other men and women outdoors in crummy weather will understand this acronym, since in our experience as volunteer workers for Oregon State Parks, adding to that my experience as an observer of human beings in the field of Anthropology, it is women who are more likely to brave such conditions). Of course, I knew this meant the return trip was really going to hurt. But there was much to see, some beautiful little spring flowers, creepy crawly critters, newly budding trees, some cute little streams and waterfalls, and some old rusty cars... yes, cars.


The trail flattened out past the descent of the first hill into a beautiful oak recovery forest area along Mary's River.

This area was from Howard K. Smith's 143 acres and became part of the Benton County Park System through the Greenbelt Land Trust in 1997.


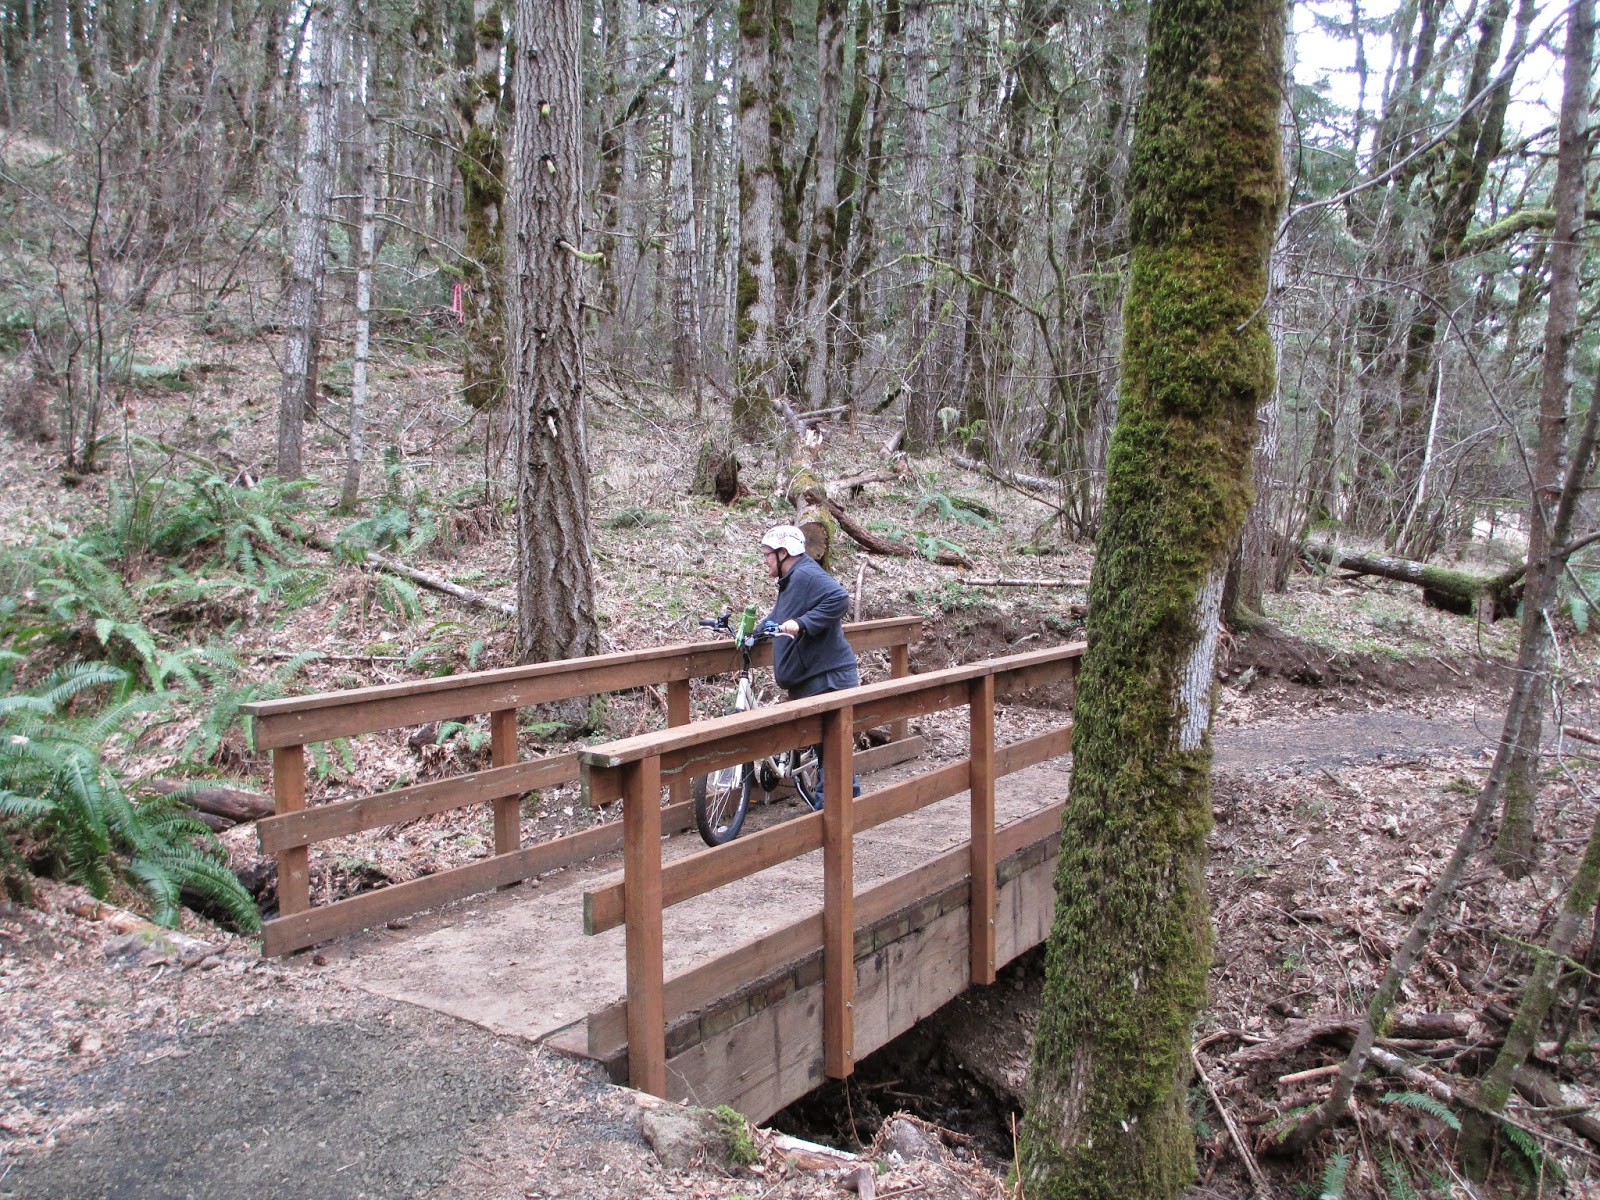
This trail is really an extension of Cardwell Hill Drive and is a stunning well-graveled hike with parking lots at both ends, and if you loop back toward the east parking lot, your thighs are going to be burning having to go steeply back up hill for about a mile! If you're mountain biking, this is going to be a decent work-out. It turns out to be about a five to six mile hike down the gated-off Cardwell Hill Drive (which is a continuation of Oak Creek Drive as it turns off toward the McDonald Dunn Forest trailhead area we usually visit).We saw no other people during this hike, so it was pleasant and serene.


Walking along Mary's River was breathtaking especially at the part where you can wander down to the river's edge and look up at the old railroad tracks and truss bridge. Of course, we gave into our inner mischief and scrambled up onto the tracks - feeling like the kids from Stand By Me. We even found a sledge hammer rusting away beneath the vegetation by the tracks. Kind of a neat find. Pedal Poppers packed it home in a backpack.


We imagined ourselves crawling back across the tracks should a train come, but we headed off, back along the path assuming the tracks were no longer in use. Then, guess what! We heard that train, and along it came!


So, rest assured, my thighs were burning as we returned to the car. Pedal Poppers handled the steep climb much better, and thankfully gave me the push of hope to get back up the last big hill.  Now that we're home, we've juiced and are relaxing, watching Graham Norton on You Tube. Best talk show ever! Watch the one with Russell Crowe, Amy Adams, and Henry Cavill. Hilarious!

Catch you all later.

-Sprocket

Monday, March 16, 2015

We made it - 21 miles with hills!

This will be a shorter blog since I didn't take pictures today. We started the day working on the brakes on my bike, which have gotten fairly loose. Even after getting them tuned at Corvallis Cyclery, they weren't a great deal better, so with You Tube to guide us, we got them all fixed up for the ride. We didn't mind - we're learning more about bikes, and the dogs love being outdoors with us. One of our first purchases was a bike tool kit, (an inexpensive one - Nashbar's Essential Tool Kit for $49.99) given the grad school budget.

Our next purchase for the bikes is a work stand, like the one shown below - the Park Tool PCS-9. It can be fairly difficult working on brakes and trying to spin the wheels when they are parked on the ground. Derailleur work is equally difficult with the bike flipped upside-down. Given that I once worked on bikes (many years ago) and even built a few, we are not overly daunted by doing bike work ourselves. Plus, with You Tube at our fingertips, we have lots of bike mechanics to resource online.


To get to the real purpose of today's blog, today was my first 20-plus miles in a single ride on a bike since I was about 18 years old. It felt awesome. I think Pedal Poppers and I are doing well for having only begun biking in February. I paced myself on the early hills in the ride, and my new bike saddle - the Specialized Body Geometry Ariel worked out great. So we started from home, rode up to the McDonald-Dunn forest trailhead (where we typically start our hikes up to McCulloch Peak or Dimple Hill). Then we reversed course, going south to Bald Hill's north parking lot and along the Midge Cramer multi-use path and out at the south parking lot. From there, we rode into Philomath, crossed Hwy 20 and turned east up Applegate, catching the bike route we typically take out there and back.


We stayed on this bike route into the downtown area of Corvallis before turning back west and riding up through campus and back home. Starting with the largest climb at the beginning made this possible for me, making the ride fairly easy.

If you are also just beginning to ride a bike to get in shape, you might be wondering how to keep your energy up as you progress to longer rides. There are many expensive energy bars out there. But we've found that the best calorie boost before or during a good ride is the most simple and inexpensive of treats - Nature Valley crunchy granola bars. There are plenty of different flavors (Oats 'n Dark Chocolate is one of our favs) and their ingredients are not foreign or particularly unhealthy. They do have enough calories for a quick boost. 
We commonly split one two-bar pack and fuel up with Smart Water to keep our electrolytes up. These work great. If we know we'll be doing more than usual, such as a lengthier hike or ride, we might start with a spoonful of peanut butter and a protein shake before we head out and take two packs of these granola bars for the overall trip (these are necessary when we are out for more than an hour or two). When we get back home, we commonly juice or have an early dinner.
For those who might be wondering, the weight loss is going well two and a half months into this new way of life; we are both aiming to have lost 30 pounds each by the end of March (having started back on Jan. 1st), and we're right on track for that. At halfway through the month, I have 4 pounds to go for this goal, which is reasonable at the average 2 pounds per week we've each been losing. Of course, there is a long way to go beyond this, and while pounds can quickly become the focus, in all honesty, we don't pay weight loss too much attention in the overall scheme of things. The real aim is to continue living and eating healthily, and in doing that, the pounds really come off on their own.


Hope to catch you all later.

-Sprocket 

Sunday, March 15, 2015

McCulloch Peak

We continue getting in shape and eating healthier. We spent several hours a couple of days ago hiking almost entirely up hill to McCulloch Peak which sits at about 2115 ft. (up from the 235 feet we started at from home in Corvallis, up from 480 at the trailhead). This is a nine mile hike that can quickly turn into a few more if you decide to explore some of the rogue trails. We figured we turned it into a ten-miler doing just that. McCulloch Peak can be seen from our backyard and is in the southern part of the McDonald-Dunn Forest, accessible from the Oak Creek Drive trailhead. From this trailhead, as you head out, either north or west, there are many old logging roads, some still nicely graveled, others overgrown, but many in use by hikers and mountain bikers.


Because of this, and some well-established rogue trails, it can be confusing winding your way to the peak without deviating to other paths, which is what we did, despite having a map with us. There are various maps of the region, and many are not entirely up to date. I'm not saying it would be easy to get lost, forcing you to spend a night in the forest, but Google Maps is missing some of the roads we came across.

If you think you can predetermine landmarks to avoid getting too lost by using satellite maps, think again. Even the most popular satellite maps show clear-cuts that really are no longer clear at all. See my matching contour diagram lines on the two satellite maps below - the big inverted-Minnesota-shaped clear cut circled in yellow should have been visible since it was (at one time) located just southwest of McCulloch Peak. Since it takes forest trees several years to grow back to the sizes they are now, I would say that some of the satellite maps of this area on Google have to be about 15 years old. The first map below is from Google, the second is from MapQuest. The second map is more accurate to what we saw when hiking in this region.


Google's topographic map, however, made a lot of sense to us with the terrain changes we were experiencing, and was more helpful when paired up to a paper trail map. Switching from one to the other can be a bit of a pain, even if it beats getting off on the wrong road/path as you try to find a couple of the summits at or near McCulloch Peak (there are three accessible peaks - see the first map). I would steer you toward Google's topographic map and toward GPS over a paper map.

Our $7 Sky Island Graphics paper map of the Corvallis Trails was OK when paired with Google, but not entirely helpful on its own (although just purchased new, it missed a few old logging roads - 750, for example, was not accurately marked, and others were shown that were simply not there anymore, and no sign of them was to be found). For $7 for a small map, it got easily frayed at the folds with just one trip into the forest. It would benefit from some lamination - it's Oregon - a little rain, and it would have been pulp - just saying.

But enough about the mapping concerns, because we want you to get out there and see the views and enjoy the outdoors. The graveled roads are wide, and there are other people on these trails, so have no fear! For great directions on getting to the top from the trailhead, go to Trip Advisor.


These pictures show our journey along a blocked rogue trail we took where we ran across about 20 downed trees in a tight area. It looked like a domino effect leveled a lot of them with one large tree taking down another and so on until this area was nearly impassable. Still, with some log hopping, climbing, and ducking, we got back to the main trail and continued on toward McCulloch Peak.

The picture below really shows the incline of this hike, which can kick your ass if you're not up to it. This is definitely not something I could have done on day one of getting in shape, but now, a month into daily exercising, it was really not all bad. I was tired by the time we got back to the trailhead, and Pedal Poppers developed four heel blisters in those great boots that had not ever caused these issues before. So, yeah, there was some pain in this hike, but we were well rewarded with a view from the top.


Looking down at it all, it's really something to know you hiked the whole way up. Running out of daylight, thankfully the trip down is much quicker, a thigh-burner going up, a calf-burner going down. But, as you can see, there is a lot more forest around Corvallis to explore, and thankfully, these areas are trail-heavy for just these types of adventures!

Hope you get a chance to see McCulloch Peak yourself. Plan for about a half-day (4 hours).

Catch you later.

-Sprocket


Saturday, March 14, 2015

Bike Frame, Bike Seat

I was very excited to get my Fairdale Weekender Drop frame and forks today. I've been ordering my bike in pieces each month so we can assemble mine for a lower cost with the parts I actually want for touring. Without having to eventually replace parts that come already assembled with the bike, we can order these parts separately through various online dealers offering discounts, and get them all matched up correctly from the start. By eliminating waste from parts I would eventually want to replace later anyway, this also makes it so we can still afford the AWOL Elite touring bike for Pedal Poppers.

The only problem was that my new frame had a slight ding and missing paint right in the top of the headtube where it actually matters. This made it so I could not set the headset and forks in place.

So, my much anticipated frame and fork are heading back to the shop (in Colorado) for a replacement, but it's all well and good. I don't have a lot of the other parts for assemblage yet anyway, so waiting a few more weeks is no major concern. In the meantime, I will continue to ride around town on the heavy little commuter bike I have. I will discuss that and solutions for the sore butt problem I've been having shortly.
Butt first (haha), here's a closer look at that little mar that I could have likely cleaned up anywhere else on the frame, but what a difference it makes when you need to set the fork and headset in this very spot so you can actually turn the front wheel as you ride down the road!


Notice the flattened out portion where the ding is - right where the headset needs to cinch down and hold the fork and upper handlebar and stem assemblage in place.... This needs to be a pretty perfect circle, so obviously this is beyond my steelwork bending (or hammering) skills - going to have to send it back - too bad. It's sure a pretty frame that I hope I can still get in these black and red Trailblazer colors (kind of difficult to find this 2014 frameset in my size) - this was my tribute to Oregon and my mom - the biggest Blazer fan I know. She has supported me through grad school, helped me with finances whenever I found myself in dire straights, and has inspired me to get in shape, since she, at nearly 70 years of age, looks great and exercises daily. Pedal Poppers will have a gunmetal grey bike with orange highlights, symbolic to some degree of our Oregon State University colors.


So about that bike seat... I tested the Specialized Romin Evo seat that I wrote about a couple of weeks ago. I thought it would work for distance cycling, helping me with my tailbone suffering. And it did just that! The Romin solved this problem with a tailbone cutout, but even with my sitbones positioned just right on this 143 mm minimally padded seat, its pointed wings at the periphery of the seat started causing saddle sores when we amped up our riding to 15 miles per trip.


So, while this is a great lightweight seat, it wasn't the one for me, and back to Peak Sports we went.

Since the Specialized Romin seat was otherwise great, I looked for another Specialized seat with a similar design but without the winged points. And there it was, the woman's mountain biking version (same cost - $100 retail) looked like just the right fit. I'm not sure why some seats are called women's seats and some are called men's seats, especially when they have the same cutouts for the prostate or perineum region and same sitbone measurements, but whatever. No time or space to be nitpicky over gender marketing when a sore ass is keeping me from having so much fun biking! So, the saddle I am now testing has slightly more padding, a more rounded periphery, and pink and purple bunnies embossed on the cushioning...  All kidding aside, the new saddle has an attractive scrolling pattern suitable for anyone. Here it is - the Specialized Ariel, and when I positioned it directly under the Romin in the shop, the dimensions were nearly the same, no wider or longer throughout the whole saddle.


Going through this process, Pedal Poppers and Sprocket hope to be of some help to newer riders like ourselves. What we've pretty much discovered is that if you don't want a giant cruiser-fatty-ass seat, you have to accept that bike saddles just aren't the same as they were in the 1980s, but then again, neither are our butts. It's apparent that the thinking behind bike saddles these days is likely that most bikers are now wearing appropriate cycling clothing. I used to think this was unnecessary poppycock that simply allowed biking to become a more expensive sport while making every cyclist appear that they recently raced the Tour de France. I mean, I never wear a full baseball uniform when I go out and toss a ball to my nephew. I also don't put on caped crusader's tights even when I'm feeling a bit superheroic (or do I?).

So, what happened to jumping on your bike in casual jeans and a t-shirt and cycling 20 miles to the next town to pay a short afternoon visit to Grandma and Grandpa? What happened to taking a spin and letting that jaunt turn into a few extra miles into the countryside? Well, what happened is that the modern bicycling philosophy assumes most riders are wearing the correct modern cycling gear. With that in mind, the newer seats require padding to be worn when the cyclist rides over 15 miles. This helps to cut weight in the seats, and goes along with other lightweight modern components that allow for better power to weight ratios, which in the end, allows you to more easily log those miles on that bike of yours. With this in mind, if you're wearing the right gear, you don't need heavy seat padding. The nicely padded cycling shorts suited to your own body make fatty seats on road bikes unnecessary.

So, to accompany the new saddle, it's advisable that I get that needed padding from some good chamois shorts. The chamois padding is a dense, lightweight foam, fitted tight to the body where directly needed. While this might not be the look I want to go for at my current weight as I get in shape, these can go beneath my regular shorts. To get an idea of what these look like for new cyclists, you've likely seen many other fit cyclists wearing these, but might have been put off by them for yourself for one reason or another. Believe me, aside from contorting men's bits and bobs into mysterious shapes that attract lengthy gawking and snickering from even the most genteel among us, they have other useful purposes.

For those still trying to bike themselves to fitness without having to purchase and wear these, keep in mind that they do have an actual purpose that might save your arse. And for those less knowledgeable about colors that work - black is better at masking the bulge or creases thereby alleviating some of the lengthy stares you'd otherwise get when stepping into the local coffee shop during your bike outing. If you are well-endowed and don't mind the looks, then go with white, by all means. Here is a pic of a basic short with chamois lining. Prices vary on these, but finding shorts, like these from Pearl Izumi, with high ratings at a minimal cost is not unreasonable.


Chamois linings also vary from short to short, but below is a nice illustration from 4motion on how chamois pads work, fitting right into that circular-sewn crotch-region of cycling specific shorts.


There are many companies making chamois shorts, some with short and shirt sets, some as bibs and even longer pants for cooler weather. There are several that even include looser cargo-type shorts to go over the skin-tight short. The idea is that the padding stays close to your body where you need it while matching up to your saddle. In many cases, these shorts also allow moisture wicking, breathability, coolness, and protection from the hard bike saddle and friction chafing to the nether regions.

The advice I've seen on these is to wear them right next to the skin - NEVER put them over your underwear, or you defeat the purpose of these. In addition, you can also lube your body or the chamois pad directly where chafing occurs. Chamois cream type products exist under about a hundred or so brand names. I recall my Grandpa using Bag Balm for just about everything like this, sometimes accompanied with corn starch patted lightly over the Bag Balm at those areas. Let me just say, that old generation was resourceful when having to walk twenty-plus miles to work sometimes in thick chafing denim. So don't overlook their inexpensive solutions. I am guessing Bag Balm is still around in modern times because this old solution still works very well - something I can personally attest to. Thanks to recommendations from my old Gramps, I've never as an adult had a medicine cupboard without it. In this case, Bag Balm is a reasonably inexpensive solution though I will likely also give the chamois specific creams like Assos or Chamois Butt'r EuroStyle a try in the hopes of better preserving expensive cycling shorts.


As for taking care of those new cycling shorts, I've read that most cyclists hand wash them after each cycling venture in cool water and mild soap (Dr. Bronner's Castile Soap or Murphy's Oil Soap). This prevents bacterial build-up - you must do this after every cycling outing. Then machine wash after every five uses to keep the cycling shorts and chamois pad from more rapid deterioration caused by harsher laundry detergents and more frequent machine laundering.

That's all for now. Hope this helps the other new cyclists out there.

Catch you all later,

Sprocket

Monday, March 2, 2015

Coccydynia... Bah, medical terms aside - I have a sore butt

No pain, no gain? Well, no gain if the pain keeps you from riding, right? Yesterday, I pedaled 15 miles for the first time, burned 750 calories, and it took me an hour. There are much better cyclists who can do five times this distance in likely the same amount of time, but as Pedal Poppers and I continue getting in shape, the more time I spend in the saddle, the more I have to wonder if many other riders have experienced tailbone pain like I've been having. I think I can do 20 miles at a time if I can keep my butt from becoming too sore. It is somewhat moderate to severe pain that alleviates a bit after sitting for a while, but is worse when I first sit down or stand to adjust my seat.


When I look this problem up in the hopes of finding a better bike saddle, I find dozens of riders with similar pain. A few folks recommend gel saddles for perineum pain and saddles with cutouts for the prostate, while others say that gel saddles do little to no good in preventing bone pain and may even cause more pain and circulation issues to other areas (namely the reproductive organs). We can find a number of ways to get proper sit bone measurements online to help us choose saddles that prevent pain where the sit bones hit the saddle, and some riders expound upon how padded shorts with chamois help to prevent chafing - something Pedal Poppers and I refer to as "chub rub." But please, while there are a number of posterior and nether region ailments due to bike saddle insufficiency, let's not get too sidetracked.

I've seen a number of reviews on bike saddles in general in terms of price and comfort, but nothing specifically that addresses various painful regions from riding. What I've been hoping for is a list of saddles that work specifically to prevent tailbone pain - a.k.a. coccydynia, so we can keep on riding. Since perineum pain is also common, if the saddle addresses both these issues, all the better. In fact, if there is an all-purpose saddle that addresses a number of problems, great. But for now, thigh chafing is not the issue, nor are saddle sores, nor is a mashed prostate. The issue is tailbone pain from riding a bike five miles or more every day, with perineum pain a distant second. Sit bone pain would be the third consideration, but since proper measurements can largely help that concern, we need some seats that eliminate painful contact where pressure sensitivity is at its greatest.

Since I haven't found such a list as of yet, in the hopes of helping myself as well as other new bikers suffering from coccydynia, I thought it best to make a list of bike saddles going on the reviews I've read thus far for 2015.

1. The RIDO R2: An all-purpose saddle, not constructed from gels or foams that compress, but of a more rigid moulded skeleton covered with a skin that offers localized flexibility where needed most, many reviewers indicate that this saddle solves the majority of their riding pain in the tailbone, perineum, and sit bones. This particular saddle can be used on commuter and touring bikes. There is a lighter-weight version for racing - the RIDO RLt. These saddles are from the UK, come in a variety of colors, and can be ordered directly from the RIDO site for 42.50 Euros or close to $47 in the US for the R2, and 68.50 Euros or $77 for the RLt.


2. Specialized Body Geometry Saddles: There are both female and male versions of a number of seats in the Specialized line-up. Most of these appear lightweight and race ready, but there are more leisurely saddles to be found in this line-up as well. Many of these are made to suit a variety of sit bone measurements as well as desired padding levels. For the different biking activities, such as mountain biking versus cyclocross versus road racing or even touring, there are many options, all of which are intended to meet the highest levels of biking comfort with minimal pressure to the tailbone, sit bones, and perineum. A common feature on these saddles is the cutout region for the perineum and tailbone. Some are waterproof, some use gel for comfort preference, while others are more lightweight, using carbon shells for racing. Prices can be up to $300 for the highly rated S-Works Romin Pro, whereas the Romin Pro, Romin Expert Gel (pictured), and Romin Comp Gel range from $200 down to $100.

3. Sunlite Cloud-9: I haven't forgotten those folks that like riding for leisure around parks and campgrounds, around neighborhoods, and perhaps just commuting to work each day. Maybe those racing saddles have the cut-outs you need to save your butt, but you might be thinking that on a three-speed or cruiser, they'd look a bit out of place. The Cruiser Gel Sofa (pictured left) is one of the Sunlite Cloud-9 series saddles with many strong reviews. It features a deep cutout for the tailbone and perineum, and is very affordable at around $27 to $45 depending on the seller. There are a number of other seats from this maker with shallower cutouts, springs, more padding in the sit-bone region, and even a sportier version (the Non-suspension Sport Saddle, pictured below) for touring or even racing if you're in the market for a saddle under $25.
If looking to address tailbone and perineum pain caused by bike riding, it really appears that above and beyond gel cushioning, what is really necessary are what I will call "coccyx cut-outs." These types of seats are likely to help prevent coccydynia. If this can also solve perineum pain and sit bone pain, all the better. To me, while I will likely get my sit bone measurements at my local bike shop, the seat that I am going to try after this bit of research is the RIDO R2. Mid-range in price and with construction that appears to resolve most PITA issues, I'll let you know how this works for me. Until then, safe and more pain-free riding to you all.

Catch you later.

-Sprocket


Wednesday, February 25, 2015

On tae the Fitton Green (said in my best Scottish accent)

Whew, boy. Getting fit today kicked my ass. Here I am sitting at home after 4 hours on the trails, drinking my Heartbeet juice (mainly carrots, apples, and red beet root), trying my best to recover. We did that nice Dimple Hill hike yesterday, so I thought we'd go it a bit easier today, but it was not to be. We've really wanted to check out an area west of Corvallis beyond Bald Hill called the Fitton Green. And boy, did we do that, even getting lost a time or two. Our 5 mile bike and hike turned into a 9.4 mile adventure, most of it hills upon hills.


Because of the hills, this was by far the hardest workout I've had to date, although Pedal Popper's 21.3 mile journey the other day still tops it. There are new hiking trails through the Fitton Green forest, so I had to map this out on Photoshop as best I could. The blue is the route we traveled before deciding to head back home. From that point on, the route is in pink. If I were to compare this to another hike, the closest I could say this comes to is the loop around all of the ten falls at Silver Falls near Sublimity and Silverton, Oregon - but there would be no biking on that route. Since the bikes made the entire journey with us, being ridden or pushed up the steepest of trails, this kicked up the difficulty level of today's route a notch or two.

Reaching the summit of the Fitton Green is higher than Bald Hill just east of this, and you can start from one of the same parking lots used to access Bald Hill. Unlike Bald Hill, the Fitton Green is not just one trip to the top. You climb to what appears to be one summit, then up and down rolling hills to another, and then another. Just when you think you have it kicked and can coast downhill, you find yourself going the wrong direction and circling back around and up that giant hill you just rode down! Adding an extra mile of hill at the end of the trails is what had me nearing exhaustion. And I poorly rationed my one bottle of water, never believing we would be gone half the day. So, while maps are fun and can really surprise you in terms of total area covered, the pictures are a million times better. Have a look.


First summit area resting, and having fun with our old friends - the trees.


Second summit-like area. Another resting spot. Thought we were at the top - the view said so, but the trail knew better...

Baby trees popping up everywhere.

Funny little lichens.

 Up, up, up...


Gotta love the old dead trees that are still alive with ferns and critters.


 The spooky milestone tree and.... MORE TRAILS!

Always neat little finds in the great outdoors. The snail seemed to have moved out.

 And there's the real summit!

An Oregon Iris in full bloom in February? Hmmm, the Audubon Society says they bloom from April to June in the grassy lowlands. These two flowers were the only ones on the whole hill, so it was a real treat to spot them. Our February has really felt more like sunnier and warmer April. I'm tempted to get the spinach planted soon. Suppose I'd invite a late winter snow then.

 The view - those clouds did drop a wee bit of rain on us, but hey, we're on the Fitton Green!


Riding through the Mojave... eh... just a dry dirt road toward the end of the trail - but we have not had much rain at all this month, and as an old Oregonian gardener and landscaper who remembers February as one of the wettest months in the valleys, I'm a bit perplexed.

One of the trailhead signs with our reflections, but we still had a few miles to go. This was our last trail pic though for the day, Strangely, we had the whole trail to ourselves the entire length of it. Once we left the Bald Hill area, we never spotted another person until we got back to the roads.

So that was our exercise outing today. I got my rims and brakes hot descending these hills, but it was FUN!

Hope to catch you all later.

-Sprocket